As an Amazon Associate we earn from qualifying purchases.
A few things will take your next burger or sausage recipe to the next level quite like grinding your own meat. The control you have in food safety, quality, mix, and texture is unparalleled in the kitchen.
But, for all the same reasons I need to be cautious of ground meats on the store shelves, I need to be equally conscious of how I clean and take care of my own meat grinders. I’ll be going over how to keep your meat grinder clean and corrosion free!
Quick Navigation
- How to Clean a Meat Grinder
- Different Types of Meat Grinders to Clean
- Step 1: Grind a “Cleaning” Food
- Step 2: Get the Grinder Ready for Cleaning
- Step 3: Disassemble the Meat Grinder
- Step 4: Soak Non Electric Components in Hot Water for 5 Minutes
- Step 5: Scrub Each Piece One by One
- Step 6: Rinse and Hand Dry
- Step 7: Air Dry
- Step 8: Wipe Down With Food Grade Mineral Oil
- How To Clean Rust Off A Meat Grinder
- Conclusion
How to Clean a Meat Grinder
It is important to clean your meat grinder as soon as possible after you are done using it. The longer you let anything sit in the grinder, the harder it will be to get it out.
As with all food products, trace amounts of meat or fat can cause food poisoning if allowed to spoil and then become re-introduced to your next grind. Luckily, meat grinders are fairly simple devices and can be disassembled and cleaned easily.
Here’s a quick outline of the steps, which I will talk about in detail below:
- Grind a “cleaning” food (such as bread)
- Get the grinder ready for cleaning
- Disassemble the meat grinder
- Soak all non-electrical components in hot soapy water for at least 5 minutes
- Scrub each piece one by one
- Rinse and hand dry
- Air dry completely
- Wipe down with mineral oil (optional but highly recommended)
Different Types of Meat Grinders to Clean
There are many different types of grinders out there nowadays and these steps will work for pretty much all of them. Some of the most common types you will find are:
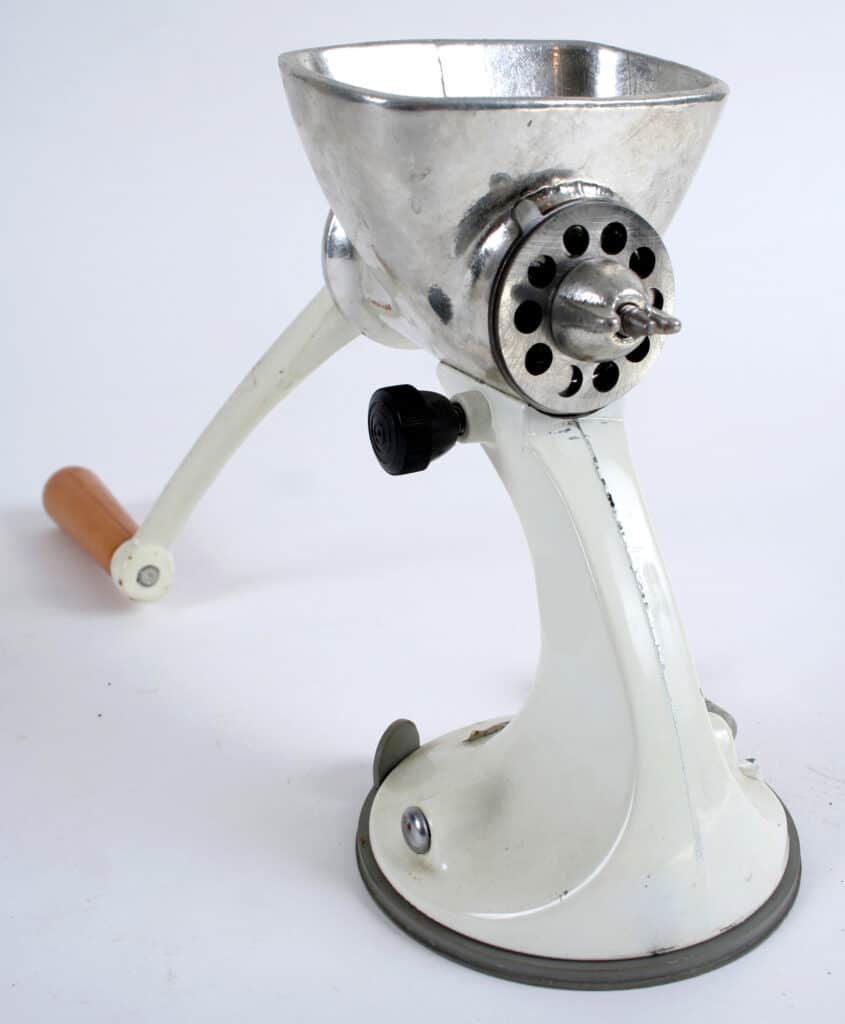
- Old fashioned manual grinders: These are the ones that you probably picture when someone says meat grinder. They have their own stand and are operated by a simple hand crank. Because of their simple nature these are the easiest to clean. You will want to make sure you are clear on your grinder’s disassembly process, but basically, you will take it apart and clean pieces individually with soap and hot water.
- Electric grinders: These are just like the manual ones except they are powered by an electric motor rather than a hand crank. Some electric models feature advanced settings and controls that help ensure the most consistent grind. These are a bit less common in the home kitchen, as few people grind enough of their own meat to warrant such a specialized device. If you have one, you likely already know how to clean it, but I’ll still have some tips and info for you!
- Add-On grinders: Becoming ever more popular is the category of Add-On or “grinder attachments.” The most popular is probably the grinder attachment for KitchenAid stand mixers. These grinders are somewhere between the electric and manual versions as they have no internal electrics of their own. Instead, they are using the drive power from the stand mixer to do the work.
Step 1: Grind a “Cleaning” Food

The most common cleaning food for grinders is bread. Yes, good ol’ fashioned white bread is best.
Don’t have white bread in the house, or grew up in an Asian household like me and had never heard of people doing this until you got older? No problem, use any other neutral, porous food. In Asian households, it isn’t uncommon to use radishes to do this.
Your goal is to get everything out of the die holes using physical pressure, and anything you get out of the housing is a bonus.
If you don’t have anything at all that will work for this, you can try skipping this step, but you may need to get a pipe cleaner, chopstick, or toothpick to clean the die holes manually. If you are lucky and have a fairly powerful spray setting on your pull down faucet, this will work too. If you really need to, you can get creative and spray it with the hose or a showerhead.
Step 2: Get the Grinder Ready for Cleaning
Once you have removed the stick meat particles from the die, you are ready to turn off the grinder. For electric grinders, make sure they are fully off and unplugged. For grinder attachments, you are going to want to remove the attachment from the base unit.
Step 3: Disassemble the Meat Grinder
I recommend you move near a sink for this. Remove the die, blade, and screw assembly. This will be a little different for each model so check your manual. In general you will remove the front die cover to do this.
Step 4: Soak Non Electric Components in Hot Water for 5 Minutes
Fill a large tub or plug and fill your sink with hot soapy water and add the pieces to it. You will want enough water to cover all pieces. The hot soapy water will aid in the removal of any leftover grease or food particles and start the work sanitizing.
You are going to want to soak it for at least 5 minutes, as this will give enough time for the heat to work on releasing the grease and food.
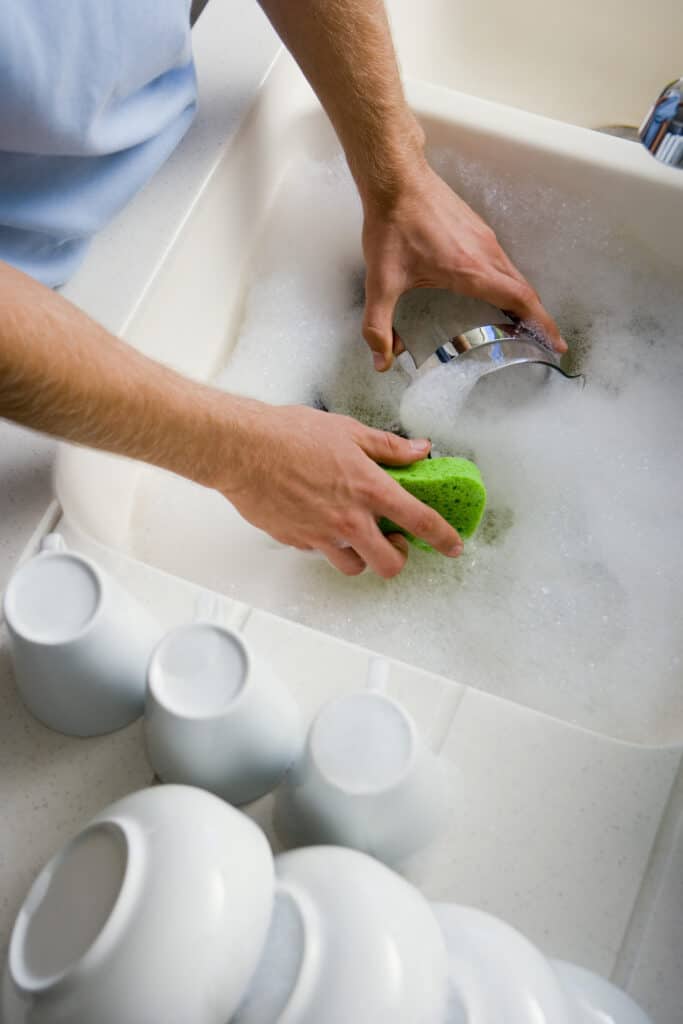
Step 5: Scrub Each Piece One by One
No shocker here, each piece needs to be cleaned with a sponge and warm or hot soapy water just like you would be cleaning a knife or pan.
Step 6: Rinse and Hand Dry
Rinse everything off with warm water and then hand dry each piece with a clean towel.
Step 7: Air Dry
Air dry components to ensure they are completely dry (a few hours to overnight is plenty long enough).
Step 8: Wipe Down With Food Grade Mineral Oil
This step is often overlooked but is a huge benefit to the longevity of your meat grinder, especially for storing your grinder long term (at least a week at a time if not a month).
Once everything is completely dry, wipe the metal down with mineral oil before storing it. The mineral oil will effectively prevent air from reacting with your metal and thus prevent corrosion.
How To Clean Rust Off A Meat Grinder
You can clean rust off the body and die plates using baking soda, steel wool, and small application of elbow grease (i.e. scrubbing). If the rust is on the blade however, this is really going to depend on how bad it is.
If the rust is deep enough to change the shape of the blade, you should throw it out and get a replacement. If the rust is surface level or not on the cutting edge itself, you can use the baking soda method.
This is because while there is plenty of mechanical tolerance to the handle and dies (the amount of space something can vary before something doesn’t work). A blade without a straight edge will not cut as efficiently and will be more and more prone to future issues. Worst case, if you don’t catch the rust, tiny pieces of metal in your food – yuck!

Conclusion
A meat grinder is a great way to take more control of your food prep and quality. Remember though, with that control comes the responsibility to care for it. With a few simple steps you can ensure your investment lasts for years to come. Keep your grinder clean and those medium rare steak burgers coming.